bouillon {tutorial}


I get asked a lot about making stocks. probs because I post a lot of pictures to the social medias like this:

stock pot

with the caption “stock day!!!”

and this:

stock pot3

with the caption “stock day!!!”

and this:

stock pot4

with the caption “stock day!!!”

and many more, but I’m sure you get it.

stock days make me happy because my house smells so good and I’m making something delicious, but I actually mean that it’s bouillon day because I have zero space to store stock.

bouillon isn’t hard. it’s a bit time-consuming. most of it doesn’t require babysitting, and it’s so worth it because it costs nothing beyond time and energy, it tastes far better than anything you can buy at the store, you can use up stuff that would otherwise end up in landfill or compost, you have full control over what goes into it (*cough* sodium *cough*), and you can whip up a tastes-like-homemade (because IT IS) soup in half an hour when you have it on hand.

I shit you not, I made this in half an hour tonight (and I’ll teach you how another time):

soup

it’s also handy for all kinds of other things (I’m lookin’ at you, risotto and stew and gravy and casseroles and…I’m lookin’ at a lot of you delicious things).

this is going to be way more a tutorial than a recipe because the whole shebang does require a certain amount of forethought, but there is a kind of proper recipe at the bottom and I won’t be offended should you like to skip (CTRL + F “seventh”) to that.

thing the first: the big bag o’ ingredients

I do not purchase ingredients to make my stock/bouillon. instead, I keep almost all that I might otherwise discard of the vegetables and fruits ends, tips, skins, and the rest that I use cooking other meals.

I like to use the great big brown bags from the LCBO (which may say a thing or six about my drinking habits) because, even though I make a stock at least once a month, those bags prevent things from getting all weird with ice crystals in between times.

when I’m making a meal, bringing out the bouillon bag is one of the first things I do. I put it beside where I’m chopping and toss in all of the bits as I go.

thing the second: what goes in the bag

as I said, almost everything goes in that bag and you can see as much from the pictures above.

reminder: they’re ALL SCRAPS. shit you would throw in the composter.

the major contenders are:

  • parsley/cilantro – and any manner of herb leftovers (fresh dill, tarragon, basil, thyme, rosemary ends/stems), but parsley and cilantro are basically vegetables in our home, so they’re the mainstays
  • tomatoes
  • onions – I’ll talk more about those later
  • carrots
  • celery
  • broccoli
  • peppers
  • mushrooms – those woody shiitake and oyster mushroom stems are amazing bouillon heavy-lifters
  • citrus fruits – including peels. just juiced a lemon or a lime? toss the remnants in your bouillon bag
  • ginger

thing the third: what DOES NOT go in the bag

there are some things that just don’t work. not many, but some and they mostly don’t work because they make things bitter. if you like bitter, then have at ’em.

the major contenders are:

  • avocado bits
  • eggplant bits
  • unwashed potato bits – I don’t really like potato bits in mine anyway because they can muck things up with their starchiness, but unwashed bits make things dirty

if you know of others, please pass them along!

thing the fourth: dem bones

making stock/bouillon is a great way to make use of bones leftover from roasts and such.

DO make sure to store your bones in the freezer in a separate container from your regular stock bag of compostables. this way, you’ll avoid cross-contamination (especially if your compostable bag is in and out of the freezer for each meal like mine is) AND you have the option to make your bouillon meatless or meatful…or BOTH.

I put away most bones that come through the kitchen, but things like shrimp shells, fish and poultry skins, and pork and beef fat ends can also make their way into the pot. fish bones can be good, too, but be sure to have a really good strainer before considering them.

thing the fifth: flavour

the big thing I get asked is “how do you get it so flavourful”?

I said we’d talk about onions again and here we are.

onion skins give a broth fantastic flavour and colour. other alliums, like scallions, leeks, chives, and the rest help out, too, but you can’t do much better for flavour and colour than your average yellow cooking onion.

my bouillon bag consists of 40% onion skins because, yes, we do go through that many.

all of the “fresh” stuff is compost fodder, but I also use herbs and spices; bay leaves, cloves, nutmeg, black pepper, sage, and tarragon are my go-tos.

to the last bouillon I made, I added star anise, cumin, coriander, and bones leftover from a ham. it came out rather Phở-esque and lovely, but not necessarily the right thing for a classic chicken noodle soup. I do tend to stick to pretty “neutral” (westernly) flavours, but use your imagination and think about the dishes you’ll want to create with your bouillon when deciding on flavours.

I add about 2 teaspoons of salt to every stock because that’s what you do, but I have no scientific rationale for adding salt. I don’t think you need to. I just do it because tradition. I’ve made perfectly cromulent bouillons without it because I forgot to add it.

let’s not confuse with salt with flavour. salt is not flavour. suck it, salt.

thing the sixth: the tools

I maintain that it’s not worth it to make bouillon until that great big LCBO bag is full to bursting, so an 8 quart pot is my minimum. I swear by my trusty pasta pot that I picked up at a liquidation joint for about $17 a million years ago (ok, more like 16 years ago).  the kind with the strainer insert that looks a bit like this:

photo credit: Bed Bath & Beyond. click the pic to buy that beauty. I get no kick-backs. it's just pretty.
photo credit: Bed Bath & Beyond. click the pic to buy that beauty. I get no kick-backs. it’s just pretty.

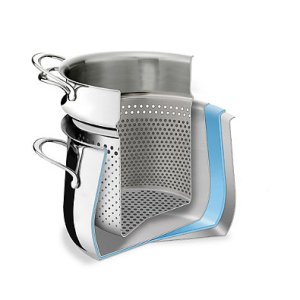
…but, ya know, whole…and not $250. one does not require precision cookware to boil pasta or make bouillon.

you can make bouillon with a large pot and a decently-sized colander, too, but a pasta pot with a strainer is the perfect tool.

and a word about straining: I don’t feel the need to strain more than through the pasta strainer insert (or colander) unless I’m trying to for something super-fancy, which I am usually not. when I am, I usually make a much fancier stock. perhaps I’ll get into that in another post.

you’ll also need a goodly-sized vessel to strain your stock into (if you don’t have a pot with a strainer insert) and a wooden spoon.

thing the seventh: the nitty gritty

ok, here’s as close to a recipe as you’ll get from me for bouillon.

what you need:

  • bones (or not – totes optional)
  • enough compost tucked away in your handy-dandy bouillon bag to fill your pot (or strainer insert)
  • water
  • salt (or not)
  • 2 tsp nutmeg
  • 1 tsp cloves (you can use ground, but I prefer to just bruise whole cloves with the mortar and pestle)
  • 1 tbsp ground black pepper
  • 5 bay leaves

what you do:

  1. if you’re using bones, place them in the bottom of your pot (or strainer insert) (I know in the pics my bones are sticking out – the only reason I mention this first is because I all too often run out of room for bones after I’ve added the compost and I have to awkwardly shuffle things around and I’m trying to save you from my mistakes).
  2. fill your pot (or strainer insert) with the contents of your bouillon bag.
  3. fill the pot (with strainer insert) with water to 2 inches below the rim.
  4. add the remaining ingredients.
  5. bring to a boil over high heat.
  6. reduce to medium heat.
  7. use a wooden spoon to push any ingredients not covered by water into the water. if they don’t all get in, don’t worry about it.
  8. check on it periodically to give it a stir and add enough water to bring the liquid levels back up to keep the contents just covered.
  9. repeat until it has simmered for at least 2 hours for a plants-only stock and 3-5 for one with bones.
  10. strain.
  11. rinse the pot and return the strained liquid (without the strainer, if you’re using one) to it.

:::choose your own adventure time:::

  1. at this point, you have three choices:
  2. YOU CAN call it a day and call this a stock.
  3. OR YOU CAN let the stock cool if you’ve used any meat products in it and you don’t want the fat it brings to the party. in this case, you’ll want to toss the pot into the fridge for a few hours (overnight is awesome because then you’re sleeping and not thinking about delicious bouillon), skim and discard the fat that has risen and cry a little, and then move onto the next option.
  4. OR YOU CAN boil that shit down! I almost always opt for this because I have the patience of a puppy on speed and enjoy that lip-smacking fattiness. also, fat becomes a different thing in a bouillon than in a straight-up stock. it gets kinda magical. definitely use this option if working with a plant only stock…because no fat…so…yeah…move on to step the next.
  5. over high heat, bring the stock to a boil, stirring regularly, until it’s reduced…well…to a bouillon. BE CAREFUL NOT TO BURN IT. you can tell it’s done when it coats the back of a metal spoon like maple syrup does. you’ll likely have no more than 3/4 to a cup of bouillon…possibly less.
  6. remove from heat and chill until cold and kinda jelly-like.
  7. cut into bouillon-like squares or just spoon it into a container (I find those little ricotta cheese containers to be just the right size).
  8. toss it in the fridge for up to one month or into the freezer forever (except not because I’m sure you’ll use it all within a week).
  9. use 1-2 tsp of bouillon per cup of water/liquid (it really kind of depends on what you’re making) to go forth and make great things with it!


ham + cheese + spinach + leek hand pies

ham and cheese hand pie

I made a seven pound ham for us last weekend.

needless to say, that was a bit too much ham for two people, even if I’ve been nibbling at the leftovers by eating scalloped potatoes with ham bits for breakfast (best. breakfast. ever.)

I made these hand pies today to deal with some of the leftovers. I’ll be making a broccoli/ham pottage with the rest, so stay tuned for that recipe.

makes 8 pies that are great for carry-away breakfasts/lunches or snacks to share with a friend. not light. this is not diet food.

what you need:

  • 1.5 c cooked smoked ham, diced
  • 1.5 c leek greens, chopped
  • 4 cups spinach, chopped
  • 4 cups cheese, grated (my recommendations are cheddar, Monterrey jack, Swiss, Gouda, some combination thereof)
  • 1 tsp nutmeg
  • 1 tsp ground black pepper
  • 2 pkg puff pastry

what you do:

  1. mix all of the above, except the puff pastry, in a large bowl.
  2. preheat oven to 400.
  3. line two baking sheets with parchment paper.
  4. roll out puff pastry into 10 x 10 inch sheets (1 package should give you two sheets).
  5. cut sheets in half, so they’re 5 x 10 inches.
  6. place a good handful of the ham/cheese/leek/spinach mixture on half of a strip.
  7. fold the “nude” part of the strip over to cover the filling and seal the side edges.
  8. add a little more filling through the unsealed edge.
  9. seal the edge that has not yet been sealed.
  10. place on parchment-lined baking sheet.
  11. repeat seven more times until you have 8 pies.
  12. bake for 20-25 minutes until golden brown.
  13. let rest a good 10 minutes before serving.


spicy, smoky stuffed acorn squash


IMG_8613[1]

I’m on a veg kick lately. I blame pinterest and all of its “bowls” of this and that, which I don’t quite get, but they seem delightful. it got me thinking that a) it’s very difficult to find bowls to accommodate these “recipes” (scare quotes because they’re not really recipes, are they? it’s almost like putting cereal together, but fancier and more deliciouser) and b) you know what else is a bowl? squash. that’s what.

I began brewing up this recipe in my head and, at every turn, it included cheese or bacon or sausage. I can’t deny it: I’m addicted to that fat-in-my-mouthness that each provides.

but I was really determined to make this vegan, though I did pick up a block of cheese while shopping for ingredients just in case. just in case. because cheese makes everything better.

I am so proud of myself. I DID NOT USE THE CHEESE.

I did not use the cheese and the dish is every bit as full of flavour and richness as I’d hoped. each half is basically a meal, though a side salad or summat would not be remiss.

without further ado…

what you need:

  • 3 acorn squash, cut lengthwise and seeds removed (save the seeds and roast ’em for a delightful snack!)
  • olive oil
  • salt & pepper
  • 2 medium onions, diced
  • 2 tsp ground cumin
  • 2 tsp ground coriander
  • 1 tsp ground nutmeg
  • 2 cups of cooked rice (I recommend brown, but any long-grain will do)
  • 1/2 cup of veg stock (optional, but handy for deglazing – you could just as easily use water/beer/wine)
  • 1 cup of corn (or one can, if going that route – I did)
  • 2 cups of red kidney or black beans (or one can, if you’re going that route – I did)
  • 1 bunch of spinach (or a cello pack, if you’re going that route – I didn’t), chopped
  • 4-6 chipotles, finely chopped (or to taste)
  • 1/4 cup of adobo (or to taste)
  • 2 tsp thyme
  • 1/2 bunch cilantro, finely chopped

what you do:

  1. preheat oven to 375.
  2. line a baking sheet (probably two) with tinfoil.
  3. cut a smidge off the bottom of each squash half so they sit flat when their fleshy sides are up.
  4. place squash halves on the baking sheet(s) face up and sprinkle with a little olive oil, salt, and pepper.
  5. turn squash halves fleshy side down and bake for about 30 minutes, turning fleshy side up halfway through.
  6. in a large skillet, over medium heat, add 2 tbsp olive oil.
  7. add the cumin and coriander.
  8. add the onions and a pinch of salt to help them brown.
  9. once the onions begin browning, add the spinach.
  10. sautée until the spinach is completely wilted.
  11. reduce heat to medium-low.
  12. add the rice and stir until incorporated.
  13. add stock and deglaze as necessary.
  14. your squash probably needs to be turned upright at this point. do that.
  15. add the corn, beans, chipotles, adobo, thyme, and cilantro and stir until incorporated.
  16. add salt and pepper to taste.
  17. once the squash halves are done (it should be fork-tender) and the stuffing is evenly hot, distribute the stuffing among the halves and return them to the oven for another 10 minutes.
  18. serve.


spicy carrot potage

in case you’re wondering, a potage is basically made by tossing a bunch of stuff into a pot with water and boiling it until it becomes some kind of (hopefully) tasty glop. straight-up medieval peasant food, yo. it’s perfect pantry-bustin’ fare.

at the weekend I found some carrots and celery that were on their way out, so it gave me the perfect excuse to make a nice potage that highlights the earthy sweetness of the carrots with a nice bump of warmth from a toasted cumin-and-chili-infused oil that gets tossed in at the end.

I like to add milk to mine for a little creaminess, but you could replace that with water or almond milk to make it vegan.

makes about 12 app OR 6 meal-sized servings

what you need:

  • 2 medium-sized red potatoes, washed and quartered (no need to peel these puppies, unless you really want to)
  • 5 large carrots, washed and quartered
  • 2 stalks of celery, washed and quartered
  • 1 medium-sized yellow onion, peeled and quartered
  • 2 bay leaves
  • 1 inch chunk of fresh ginger, peeled and quartered
  • water to cover
  • 2 cups of broth
  • 1 cup of milk (this is totally optional and can be substituted for water or almond milk)
  • a pinch each of salt & pepper
  • additional hot water, as necessary
  • 3 tbsp vegetable or mustard oil
  • 1 tbsp whole cumin seeds
  • 1 tbsp chili flakes
  • 1 tsp ground nutmeg
  • another medium-sized yellow onion, minced

what you do:

  1. to a large pot (I use a spaghetti pot or dutch oven) add the first onion, potatoes, carrots, bay leaves, ginger, salt, pepper and enough water to cover it all.
  2. bring the pot to a boil over high heat.
  3. reduce the heat to medium and let simmer for about 45 minutes or until all of the vegetables are fork tender. the carrots will take the longest.
  4. add the stock and milk.
  5. use an immersion blender or food processor to purée the lot of it until smooth, adding hot water as necessary to get the desired consistency. I like my carrot soup to be…well…loose…soupy. some believe it should be chunkier and thicker. “desired consistency” is really up to you.
  6. if necessary, return to the pot and heat over medium-high.
  7. lightly crush the cumin and chili flakes using a mortar and pestle or the back of a spoon and a bowl.
  8. in a small saucepan, toast the spices over medium-low heat until fragrant.
  9. add 1 tbsp of the oil and the minced onion.
  10. stir these until the onion is a deep brown colour.
  11. add the remaining 2 tbsp of oil and heat for another minute.
  12. stir the spice/onion/oil mixture into the soup.
  13. serve hot with a some freshly ground pepper and croutons or breadsticks.


bread sticks

bread sticks

to say I’m a soup fiend is a bit of an understatement. those around me know that, if I haven’t made a soup, or at least a stock, each week, they have good reason to doubt my mental health.

bread things go hand-in-hand with soup things, but oddly enough, I’m not much of a bread person and soup-making days are typically those when I really can’t be arsed to go out and hunt down a good loaf of bread. nevermind the fact that said loaf of bread would just go bad before we ate it all. that’s where this recipe comes in; it goes together quickly enough and is a small batch (though easily doubled for snacking purposes – people WILL snack on these) so I’m not fretting about lost foods, plus one can dress these guys up or down as desired.

below this basic recipe, I’ve provided instructions for making the cheesy-herby-garlicky bread sticks shown above along with some other notes on variations you might try.

makes 12-16 sticks

what you need:

  • 1 tbsp honey
  • 1 cup warm (warmer than luke, but not hot) water
  • 1 tbsp dry, active yeast
  • 2.5 cups of all-purpose flour
  • 1 tsp salt
  • 2 tbsp olive oil

what you do:

  1. stir the honey and water together in a large bowl.
  2. sprinkle the yeast on top.
  3. let sit for 10 minutes.
  4. add the flour, salt, and olive oil
  5. mix with a wooden spoon until combined.
  6. coat hands in flour, then knead for one minute.
  7. form into a ball.
  8. let rise until doubled (approximately half an hour).
  9. preheat oven to 425.
  10. punch the dough down and knead for one minute.
  11. split the dough into two balls.
  12. roll each ball out into a (approximately) 8″x 8″ rectangle.
  13. NOTE: If you want to dress your bread sticks up, now is the time to do it. see notes below for detail.
  14. using a pizza cutter or very sharp knife, cut the dough into one inch strips.
  15. give each strip 4 twists and transfer to a parchment-lined baking sheet with a good half inch between each stick. you’ll need two baking sheets for this.
  16. don’t worry about uniformity.
  17. reduce oven temp to 375 and place baking sheets in the oven.
  18. bake for 12 minutes.
  19. NOTE: If there is a cheese-adding step to fancying up your breadsticks, this is when you’ll do it.
  20. brush each stick with oil.
  21. bake for another 3-5 minutes.
  22. remove from oven and let rest for at least 5 minutes.
  23. MANGEZ!

Italian-esque cheese and herb (great with black bean and tomato or meatball soup)

what you need:

  • 3 tbsp olive oil
  • 1 tbsp oregano or Italian seasoning
  • 2 tsp garlic powder or 3 cloves of fresh garlic, crushed
  • pepper to taste
  • 3 cups mozzarella cheese (or provolone or marble or some other melty cheese), grated

what you do:

  1. in a bowl, mix together all but the cheese.
  2. once you’ve rolled the dough balls out into (kinda) rectangles (step 12), spread this mixture on top of each before cutting.
  3. twist and place on parchment-lined baking sheets, and bake for 12 minutes.
  4. push the bread sticks close together, all snug-like, and sprinkle with the grated cheese.
  5. bake for another 3-5 minutes until cheese is bubbling and browning.

other variations:

  • for bread sticks that goes better with a milder soup, like a cream of- or potage (or just for munching), skip the garlic, use tarragon, thyme, or basil and switch up the mozzarella for a Gruyère or Swiss cheese.
  • make a sweet version using 1/4 cup of melted, unsalted butter, 1/4 cup of brown sugar, 1 tsp of cinnamon, and a pinch of ground clove. still top it with mozzarella or provolone, or mix the lot of the seasoning with 1/4 cup of cream cheese and spread that on, if you’re daring.
  • make it tex-mex style using 1 tbsp chili powder, 1 tbsp thyme, 2 minced jalepenos and monterey jack cheese.


yorkshiritos

a friend posted this little number on my wall in that face place the other day:

I’d put some off-hand, non-committal consideration into making a Yorkshire pud wrap in the past, but this was like a challenge. so, fiiiiiiiine. challenge accepted. I’d put it on my list of things to make at the weekend and started ticking through the process before it got one Like.

it didn’t occur to me to have a look at the recipes of others who had successfully pulled this off until I was well into making the wraps, so basically about 75% done creating the meal. a big reason for that was that I didn’t like the look of the wraps’ texture in the original image. I wanted a Yorkshire wrap that looked at tasted like Yorkshire pudding as I know it, which is to say: the best, but that could hold up to being stuffed and dipped.

when I *did* look to the google, it was because I started freaking out because my first wrap looked like this:

IMG_8455
yes, my oven is in desperate need of cleaning.

which is to say, quite a lot puffier and crispier than I’d imagined according to the sciencing I had done in my brain.

things we really want in a Yorkshire pudding, but I was doubting its integrity as a wrap.

all of google’s advice was “add more flour” and “use a rectangular pan”. I’d already added more flour and wasn’t willing to add more lest it compromise the texture and, while I can understand the use of a rectangular pan, I really wanted these to be self-contained.

I sat and calmed down a bit, flipped my wrap and carried on as planned in my head. I’m really glad I did, because what I ended up with, after I let the wraps sit and calm down a bit, was exactly what I wanted with the bonus of that lip where the pudding climbed the pan and made for an excellent closure around the meat when all was said and done.

they came out like so:

IMG_8459

and they are really, really, really good.

for the roast

what you need

  • 1 2.5-3 lb pot-style roast (I used an outside round)
  • 2 cups of a cheap cab-sauv/shiraz
  • 2 cups of water
  • 2 yellow cooking onions, sliced
  • 1-1.5 tbsp vegetable oil
  • salt & pepper to taste
  • 2 tbsp dried French tarragon
  • Worcestershire sauce to taste
  • prepared horseradish to taste
  • 1 tbsp butter
  • 2 tbsp flour

what you do

  1. preheat oven to 300.
  2. heat 1 tbsp oil in a dutch oven large enough for the roast over medium-high.
  3. add salt and pepper to the oil.
  4. sear the roast until nicely browned on all sides.
  5. remove the roast and add the onions, coating the bottom of the dutch oven (add more oil, if necessary).
  6. place the roast on top of the onions.
  7. add wine and water in equal amounts until onions liquid reaches about 1/4 of the way up the roast.
  8. sprinkle with tarragon.
  9. add a few shakes of Worcestershire sauce.
  10. lid it and toss it in the oven.
  11. cook approximately 3 hours or until tender.
  12. place roast in a bowl, cover and let sit.
  13. strain the onions from the juices.
  14. add onions to the bowl with the meat and reserve remaining juices.
  15. on the stovetop, heat the butter in the dutch oven over medium-high.
  16. whisk in the flour until browned.
  17. slowly whisk in the reserved juices from the roast and the remaining wine and water.
  18. heat until bubbling, whisking every once in a while. add water to taste.
  19. shred the meat into bite-sized pieces, incorporating the onions as you go.
  20. toss some horseradish and some of the just into the meat to taste.

for the Yorkshire wraps

what you need

  • 4 eggs
  • 2 cups of milk (I use homogenized)
  • 1.5 cups of all-purpose flour
  • 1.5 tsp salt
  • quite a lot of oil

what you do

  1. while the roast is cooking, place the eggs and the milk on the stovetop to warm them.
  2. about half an hour before the roast is done, whisk the eggs and milk together in a large bowl until just combined.
  3. whisk the salt and flour into the mild and egg mixture until fully combined.
  4. once the roast is out of the oven, heat the oven to 425.
  5. add a good tablespoon or two to the vessel you’re cooking your Yorkshire wraps in, enough to generously coat it and place it in the oven. I used an 8″ frying pan and it was not ideal. see do differently notes below.
  6. once the oil in your vessel is smoking, add enough of the wrap mix to evenly coat the bottom of the vessel. because you’re working with hot oil, the batter will immediately begin to cook (and if it doesn’t, your oil is not hot enough) and not spread. resist the urge to tilt the pan (hot oil, remember?!?!) and just add more batter until it’s evenly coated.
  7. cook for 12-14 minutes (until it doesn’t stick to the bottom) and flip.
  8. cook another 3-4 minutes and set aside on a paper-toweled plate to absorb the grease.
  9. repeat as necessary, making sure there’s enough oil in the vessel and the it gets to smoking before adding more batter, until all of the batter is gone, placing paper towel between each wrap as you stack them when they’re done.
  10. fill the wraps with the meat/jus/onion mixture and serve with a side of jus for dipping.

do differentlies

no kitchen experiment is complete without a list of shoulda/woulda/couldas. here’s mine:

  • buy fucking horseradish. as soon as I saw the pic and started working all of this out in my head, I could just imagine that horseradishy goodness tossed in with the meat. alas, it did not make it from the grocery list in my head to the grocery list on my phone, so it was not purchased and I was some pissed. there’s nothing like that kind of let down at one’s own hands.
  • find different vessels for cooking the wraps. the single 8″ frying pan I used was perfect in many ways, but it was really slow going just cooking four wraps at almost 20 minutes each. they were REALLY big, too. I managed to eat half of a wrap, but the mister ate a whole one plus the half I couldn’t finish. I have one 6 inch tin pie plate and I think finding three more of those would be perfect, or just foregoing that lovely, self-containment idea, lip and all, and using a larger, rectangular vessel.
  • taste test the jus before serving. my just was far too rich for my liking.
  • serve it with a salad rather than a cooked veg. as much as I love steamed broccoli, the dish really needs something crisper and fresher as a complement to it.

overall, it was a fun experiment through which I learned a lot. I’m still going to prefer my traditional roast dinners, if only because I love a good, medium-rare, dry roast with the Yorkshire pudding serving as little gravy/jus delivery vehicles, but I think I’ll employ the wraps as a leftovers solution. one could make a mean roast beef, leafy green, tomato and cheese sandwich with that.


pantry-busting egg rolls

I was in need of an onion the other day.

I reached out to neighbours.

I have awesome neighbours. they always either have onions (or whatever the hell else I need) or are about to go to the grocery and can procure me onions (or whatever the hell else I need).

this neighbour had onions and cabbages.

I’m not a big cabbage fan, but I took them.

I put a good portion of one in a soup.

I made these egg rolls with another plus part of a bag of those random fishy bits you can find in the freezer at the grocery store.

hot damn I love those bags of fishy bits.

mmm...greasy good stuffs
mmm…greasy good stuffs

they are really rather good, so I wrote out the recipe.

::warning: this is NOT an instant recipe. it goes together quickly but marinating time IS required so prepare at least 24 hours in advance!!!::

what you need

  • 1 cup of random fishy bits
  • 2 tbsp rice wine
  • 2 tbsp dark soya sauce
  • 3 eggs
  • 3 cups of shredded cabbage (or finely chopped or whatever – no big chunks)
  • 1 bunch of green onion, finely chopped
  • 3 tbsp garlic-chili sauce (also know as sambal oelek)
  • 1 pkg egg roll wraps (I used Wing’s, which are really quite good, but I think I’ll check out my local Asian grocer’s for a more spring roll type wrap next time)
  • veg or some other high smoke point oil for frying


what you do

  1. toss the fishy bits, rice wine, and soya sauce in some kind of receptacle for marinating.
  2. marinate for a good 8 hours. more, if you’re patient.
  3. toss the cabbage and the onion in the chili-garlic sauce.
  4. strain your marinated fishy bits.
  5. sautée the fishy bits over med-high heat.
  6. crack the eggs into the sautéeing fishy bits and stir until the eggs are pretty dry. I understand that that is a very relative statement, but eggs and doneness are relative to feelings about them. I like mine done to the point where they’re indiscernible from packing peanuts, but you do you, k?
  7. remove pan from heat and let cool.
  8. working at a 3:1 cabbagey bits to fishy bits ratio, fill your egg roll wrappers.
  9. roll according to instructions. I’m not going to lie; I rolled according to instructions and mine are more eggvelopes than rolls. I know folks who have this down pat. I am not one of them. take a sip of wine and forgive yourself for eggvelopes and carry on. pat yourself on the back if you’ve achieved rolls.
  10. heat a heavy frying pan with 1/2 of an inch of oil over med-high heat.
  11. once the pan is hot, place your egg rolls in 3 or four at a time. do not overcrowd the pan.
  12. turn your rolls (velopes) when you see the edges beginning to brown.
  13. remove from pan to a paper towel-laden vesicle and continue with the rest.

I know that some folks tend to want a sauce with egg rolls. we’ve been eating them without a sauce, but I’ll try to come up with something in the not-too-distant future.


things to do with chick peas

My bestie rather emphatically announced that she found a stash of chick peas her late mum had stashed – to the tune of six cans! SIX! I’m sorry, but I do have to giggle at the obvious discrepancies in our views of what constitutes a Metric Shit Ton when it comes to chick peas. Six cans of chick peas in my cupboard is just a good shopping trip, but I understand where she’s coming from as our eating and cooking styles are also quite different and hallelujah for that because variety is the spice of life, etc.

Anyways, I promised a couple of recipes for simple things we do with chick peas in our house: hummus and a curry.

Hummus

ingredients:

  • 1 can of chick peas
  • 1/2 cup of tahini
  • 1 million garlics (this might be an exaggeration, but I use no fewer than six cloves in my hummus and it brings all the  boys to the yard)
  • juice of one lime
  • 1/4 cup (maybe a bit more) of olive oil
  • salt & pepper to taste

method:

  1. Drain the beans and toss them, the tahini, lime juice, and the garlic into a food processor.
  2. Whir the lot on high and slowly add the olive oil until everything is blended and smooth.
  3. Taste it and add any salt and/or pepper desired, as well as extra olive oil if it’s not smooth enough for your liking.
  4. Serve and enjoy.

Of course there are many things you can add to the hummus to amp it up a bit, but I urge you to think of bright and green type flavours, as opposed to heady, darker flavours. Some of my favourite are: roasted red peppers, sun-dried tomatoes, cilantro, cumin, dill weed, basil. Don’t over-complicate it.

I think we’re all good for half a clue around how to eat hummus, so I won’t insult anyone’s intelligence, but I just want to say one thing: roasted veg sammiches. It’s SO good on roasted veg sammiches.

Chick pea curry

ingredients:

  • 2 tbsp olive oil
  • 1 large, diced onion (as usual, I like the red guys for these, but yellow cooking onions and most others are perfectly cromulent too)
  • 6 crushed cloves of garlic (six is the magic number, ya know?)
  • 1 can of diced tomatoes
  • 1 can of chick peas
  • 2 heaping teaspoons of whatever kind of curry concoction you have on hand (I like madras paste and usually use my own, but curry powder works)
  • 2-3 cups of some kind of leafy green (spinach, cilantro, parsley, kale, some combination thereof, anything but lettuce…)
  • Salt and pepper to taste

method:

  1. In a large sauce pan, heat the oil over medium-low then toss in the onion, garlic, and curry stuffs.
  2. Once the onions are translucent, toss in the tomatoes.
  3. Increase the heat to medium-high and heat until it starts to bubble a bit.
  4. Drain the chick peas and add ’em to the pot.
  5. Once the chick peas are heated through, add the green stuff and stir until wilted.
  6. Serve on its own or over rice.

yorkshire pudding

IMG_8048[1]

I get asked about how to make this successfully a LOT. it’s not actually as magical as it seems, but there are a few tricks one should keep in mind for yorkshire pud that is crispy on the outside, fluffy on the inside with that perfect well for gravy in the middle. I have my dearly departed second mama to thank for all of them.

tricks:

  1. liquids should be at room temperature before working with them. I put my milk and eggs on the stove top while the roast is cooking. sometimes I forget until later, in that case, I ‘put them on the vent burner.
  2. high fat milk. c’mon, this meal is already going to blow whatever diet you might be on. don’t fuss about the fat content of your yorkshire milk. you’re going to dump a bunch of deliciously fatty gravy or jus all over it, anyway. 2% + is your friend. 3% is best.
  3. you have to get the oil in the pan in which you’ll be cooking the yorkshires to smoke. a lot of people are afraid of this and I get it – it’s a bit scary working with hot oil in the oven that you have to put your face over, but I’m not talking boiling. just smoking. once the oil is smoking, you want to poor the batter. if your kitchen is making you choke and cough, you need to turn the oven off and start again.

ingredients:

  • 2 large eggs
  • 1 cup of milk (see not above about fat content)
  • 3/4 cup of all-purpose flour
  • healthy pinch of salt

method:

  1. preheat oven to 425 and toss in your yorkshire baking pan that is well-lubed with vegetable or some other high-smoke-point oil.
  2. in a large bowl, whisk together your (room temperature) eggs and milk.
  3. whisk in flour.
  4. whisk in salt.
  5. once the oil in your baking pan is smoking, pour or spoon in the batter.
  6. cook for 25-40 minutes (if your pan is a muffin tin, you’re looking at about 25-30 minutes, if it’s one big pan, you’re looking at closer to 40 minutes).
  7. don’t be afraid to open the oven and check them after 25 minutes. contrary to popular belief, they won’t unpuff until they’ve reached that point. also, yelling, playing Nilsson really loudly, or running through the kitchen won’t ruin the puff. opening the oven before they’ve puffed and not getting liquid ingredients to room temperature will.
  8. check for jiggle. your yorkshire pud should not jiggle. you can also use a toothpick to test doneness, but I find the jiggle test works well.
  9. serve immediately with lots of delicious gravy…or next day for breakfast with lots of delicious jam.


bagel melts

mmmMMMmmm…bagel melts.  Pretty sure no better breakfast exists in the world.  Someone once asked me what my favourite sandwich is and I couldn’t answer but come to think of it the bagel melt must be it.  So it’s not really a really real sandwich.  All good by me.  It’s close enough in my books and consists of three loves of mine; breads, fresh vegies and, of course, cheese.  This one’s made with an everything bagel, roma tomatoes, dill, black pepper and mild but wonderfully melty marble cheese but they can be made with just about every flavour combination.  Try cinnamon raisin bagels with apple slices and mozzarella or provolone.  Or sesame bagels with roasted eggplant, red pepper slices and goat cheese.  One would have to try very hard to do any wrong with these…you can even nuke ’em!  That said, I strongly suggest the oven method – just slip them onto a broiling pan (I slipped mine onto the pizza stone currently occupying the oven) then into a 450 degree oven.  Once in turn on the broiler and leave the oven door open a smidge, not to keep the broiler for turning off (the bagels aren’t likely to be in there for that long) but because the cheese will go golden brown (which is when you want to take it out) very quickly and having the door open tends to make one acutely aware of the fact that there’s stuff going on in there they need to not forget.